Electronics foundation
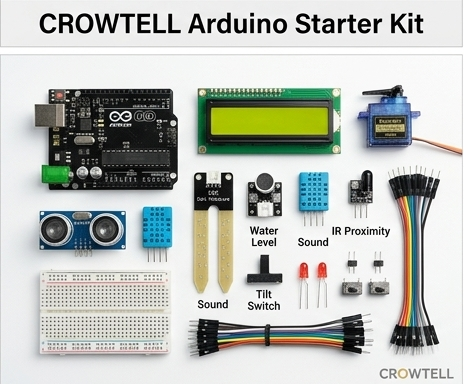
Crowtell Arduino Starter Kit
A complete starting point for circuits, sensors, displays, actuation, and embedded programming with Arduino Uno R3.
Learning outcome
Understand how code controls the physical world.
Students learn inputs, outputs, circuit completion, sensor data, display feedback, and movement through practical build-and-test activities.
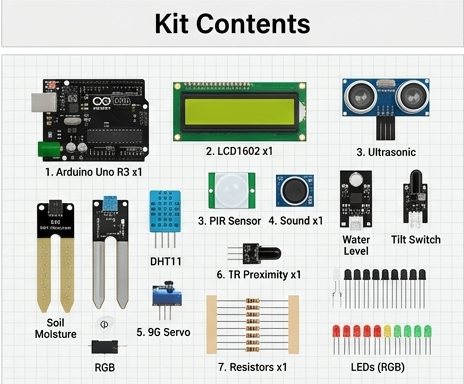
Kit overview
A complete electronics workspace in one kit.
This overview presents the Arduino Uno R3, LCD display, breadboard, core sensors, LEDs, wiring, and control parts as a ready-to-use classroom setup. It helps students understand the hardware before they begin building.
- Introduces the board, display, sensors, and prototyping parts
- Shows the kit as a full system rather than loose components
- Useful for teachers when starting a new lesson
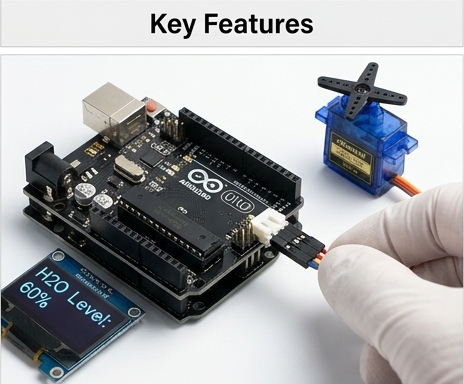
Key features
Sensor input, display feedback, and motion control.
The Arduino board becomes the center of each lesson. Students connect sensors, read values, show feedback on the LCD or OLED style displays, and control outputs such as servos, buzzers, and LEDs.
- Connect modules and observe immediate physical responses
- Learn the relationship between code, data, and output
- Scale from simple tests to multi-part systems
Kit contents
Core parts for common STEM lessons.
The contents section highlights the primary pieces students will use most often: Arduino Uno R3, LCD 1602, ultrasonic sensor, PIR sensor, DHT11, sound sensor, water level sensor, soil moisture sensor, tilt switch, LEDs, resistors, and servo.
- Covers input, output, display, and prototyping categories
- Supports both guided lessons and open-ended experiments
- Gives students a clear inventory before starting work
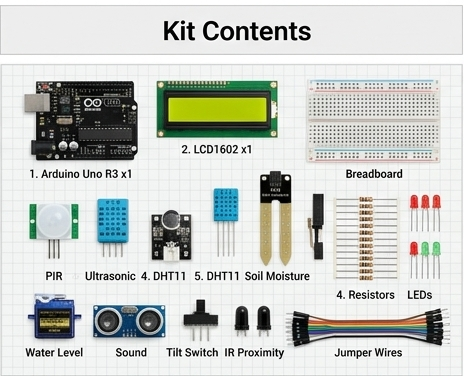
Detailed contents
A closer look at the modules students handle.
The detailed contents section separates the main components into familiar classroom objects. Students can identify the breadboard, jumper wires, sensors, resistors, and LEDs before connecting them to the Arduino board.
- Makes each part easier to recognize and organize
- Reduces setup confusion during group activities
- Helps students connect component names to real hardware
Project example
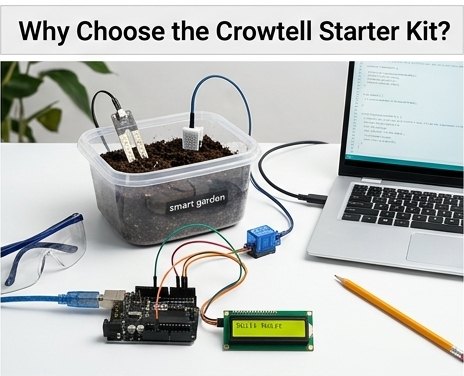
Build a smart garden prototype.
Students can combine soil moisture sensing, display feedback, wiring, and simple decision logic to make a smart garden model. The project turns separate parts into a practical automation system they can test and improve.
- Connects sensor data to a real-world problem
- Introduces automation and environmental monitoring
- Works well as a classroom presentation project
Technical specifications
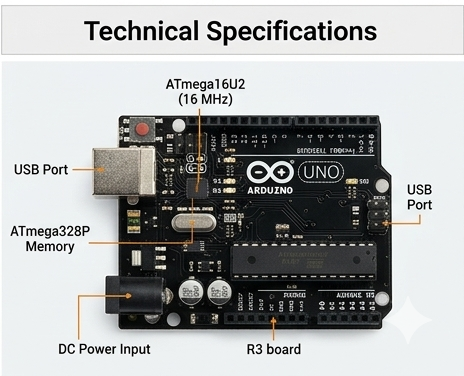
Understand the board before building bigger systems.
The technical section introduces the Arduino board layout, processor area, memory, USB connection, power input, and port labels. It gives older learners a bridge from simple projects to more technical electronics language.
- Shows power and USB connection points
- Identifies major board regions and core hardware
- Supports troubleshooting and extension activities
Kit contents
Everything needed for electronics lessons.
- Arduino Uno R3 with USB cable
- LCD 1602 with I2C module
- PIR, ultrasonic, DHT11, soil moisture, water level, sound, tilt, and IR proximity sensors
- 9G servo motor, 5V piezo buzzer, standard LEDs, and RGB LED
- Breadboard, assorted jumper wires, tactile switches, and resistors
Technical specifications
- Processor
- ATmega16U2, 16 MHz
- Memory
- ATmega328P
- Power
- USB or external DC jack
- Software
- Arduino IDE for Windows, macOS, and Linux